
QuickMark forensic watermarking
To test this feature and view the example code, please see the Apple (FPS) SDK 5 Example Code Quick Start guide.
The Nexguard library forensic watermarking tool embeds a unique, invisible serial number onto video/audio content.
Version 2 of QuickMark watermarking can work in two different modes:
In pull mode, the player acquires the watermark from the configured server as necessary.
In push mode, the customer application acquires the watermark and provides it to the player for display.
The OTVQuickmark class abstracts the NexGuard-QuickMark library functionality that provides watermarking to the SDK.
QuickMark is available for both iOS and tvOS.
Contents
The QuickMark framework contains libraries for iOS and tvOS. QuickMark also requires the Swift Protobuf framework, which is delivered alongside.
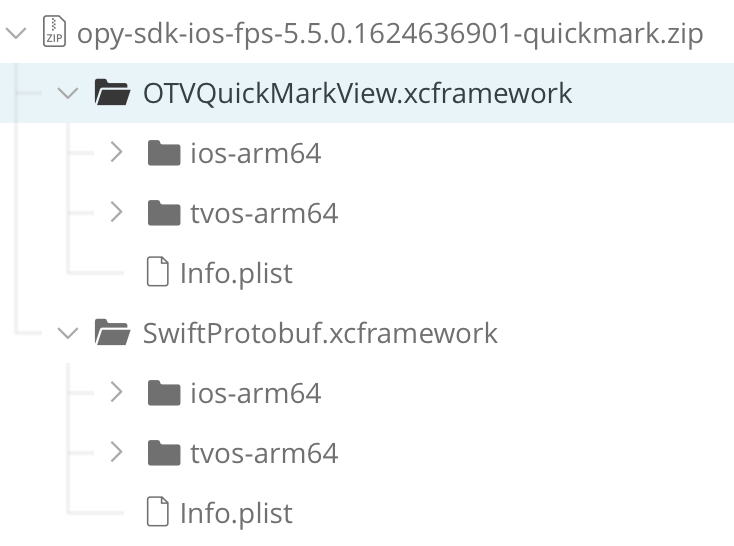
All QuickMark and dependant frameworks are contained in the opy-ios-fps-<version>-quickmark.zip file, delivered in the iOS SDK pack.
The QuickMark libraries are contained within the OTVQuickMarkView.xcframework.
The Swift Protobuf frameworks are contained within the SwiftProtobuf.xcframework.
Prerequisites
A watermarking server to generate the watermarked surface. Associated with this:
Tenant Id - you may use
TEST_TENANTduring integrationService endpoint URL
Secret key
API Key to authenticate with the service endpoint if required (optional)
A system to generate 24-bit Watermark IDs (contained within the token) to identify the user, session, and device.
Swift Protobuf is needed for the OTVQuickmarkView sdk. The original Swift Protobuf library can be found at https://github.com/apple/swift-protobuf.
Swift Protobuf gives multiple examples of how to include the library in your project. NAGRA recommends using version 1.6.0 as this is the version we have integrated and tested ourselves.
A compatible version of the library is included with the SDK deliverable from NAGRA.
The Swift Protobuf library is linked but not embedded inside OTVQuickMarkView.framework. You will need to put Swift Protbuf for your target as a dependency when linking OTVQuickMarkView.framework.
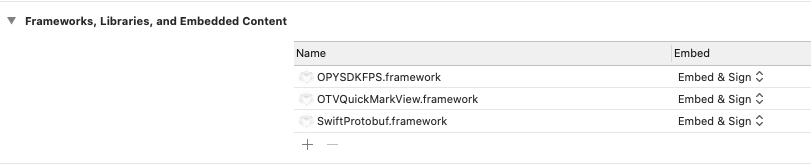
If added correctly, you should find the frameworks in the following Xcode build-phases section of the project settings Link Binary with Libraries and Embed Frameworks.
Configuration Values
OTVQuickmark requires several configuration values for push and pull mode. The table below shows which values are necessary and optional for the two modes.
Required configuration values | Optional configuration values | |
|---|---|---|
Pull Mode |
|
|
Push Mode |
|
|
If you decide not to create your own callbacks, OTVQuickMark will use its own internal callbacks, as shown in the example code. The functionality of these callbacks are:
computeCallback: This internal callback uses thesignKeyto compute the SHA-1 SignatureerrorCallback: This internal callback prints out the error message to the console.messageCallback: This internal callback prints out the message callback to the console, which contains the debug informationsaveblobCallback: This callback has no internal functionality.
Pull mode example configuration
Instantiate and configure the OTVWatermark class providing all the configuration parameters.
  func setupOTVQuickmark() {
    do {
      try otvQuickmark = OTVQuickmark(token: nxgdQmSrvToken, apiKey: nxgdQmSrvApiKey, url: nxgdQmSrvUrl)
    }
    catch {}
Set the sign key with a specific method call.
otvQuickmark?.setSignKey(signKey: nxgdQmsignKey)The PlayerView and AVPlayerLayer must be bound together to allow the presentation of the watermark. Call bind(playerView:playerLayer:) passing references to your PlayerView and AVPlayerLayer.
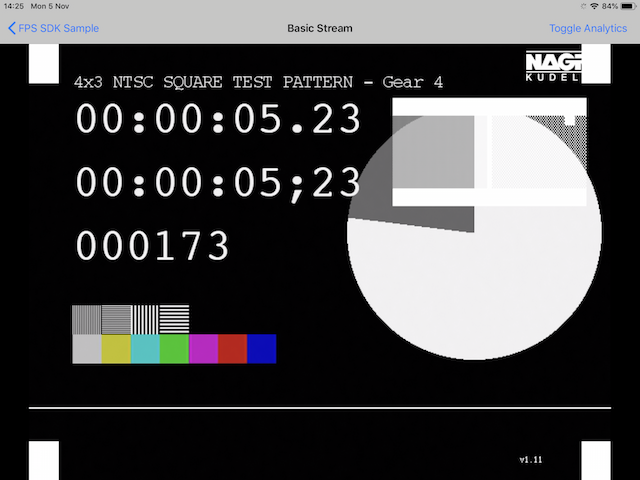
otvQuickmark?.bind(playerView: playerView, playerLayer: playerView.playerLayer)When using TEST_TENANT as the tenant, you should see a stub pattern displayed over your video.
Push mode example configuration
Push mode has additional requirements; two variants can provide them. The first (simpler) is where default callbacks are supplied within the OTVQuickMarkView.framework. The code snippets below describe the second variant where you need to implement callback methods.
Instantiate and configure the OTVWatermark class providing the names of your own callback methods.
  func setupOTVQuickmark() {
    do {
        try otvQuickmark = OTVQuickmark(computeSignatureCb: computeCb, saveBlobCb: saveblob, errorCb: errorCb, messageCb: messageCb)
The remaining configuration parameters need to be passed to your implementation that will do the work of acquiring the watermark image.
      quickMarkNetworkService = try QuickMarkSimpleNetworkService.init(url: nxgdQmSrvUrl,
                                                                       token: nxgdQmSrvToken,
                                                                       apiKey: nxgdQmSrvApiKey,
                                                                       onMessageCb: onNetworkMessageCb,
                                                                       onErrorCb: onNetworkErrorCb,
                                                                       onBlobReceivedCb: onNetworkblobreceived)
For brevity, the full example code of the callbacks and QuickMarkSimpleNetworkService class is only provided within the opy-sdk-ios-fps-<version>-example-code.zip file.
As in the pull mode example, the setSignKey() and bind() methods must be called.